PART-2 : The TicTacToe Robot Controller

Now, that we have an algorithm working, what's next? Good question. Lets take a look again at the block diagram of our electronics:

Roughly based on the above I whipped together a Schematic:

Basically a Atmel (AVR) ATMega32, with a 2x16 Character LCD, a Keypad Matrix, and A set of headers for interfacing with the motion driving circuitry and sensors.
Step 1: Preparing the firmware.
This was main part, apparently porting the windows 'C#' code to plain 'C' wasn't all that simple, after all. Well it would have been , except:

So, I did a bit of optimization, and then some more, and then a LOT more. A poem would explain better:
"Till I had reduced each int to byte,
and byte to bit,
Till each hardware register was consumed,
Till each register could be used,
or Re-Used no more,
and Lo... I present to you the 'Optimized Code-Size'" 

This I'm particularly proud of. 
Anyway, the code is divided into 5 Files:
- main.c
- game.h
- game.c
- UserInterface.h
- UserInterface.c

Step 2: Preparing the hardware.
After getting the code "Out of the way", it was time to do what I really wanted to do this weekend. Time to get some Solder Iron Burns and some spit, wire and breadboards, together!!
Lets See what we need first. Hmmm....

-Solder Iron. Check.
-Bread Board. Check.
-LCD. Check.
-Microcontroller. Check
r step -Random Headers and Stuff. Check.
-Some Discreets. Check.
-Lots-a-Buttons. Check.
All clear. Lets go....
One Hour Later:

Everything assembled to my satisfaction, and ready for testing. 

It Works!!! It Works!!!
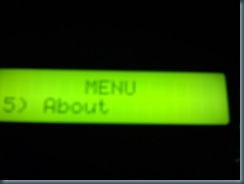
Some random screens:


Scrolling Up and Down the Menu:


Preparing the Outer Box: (I wish I had taken my art and crafts class in High school seriously 

Ooohhh the guts and wires.....
The Front Panel: (Before I got creative with a felt pen  )
)
 AAaahhh Finished....


Still Works....

Under the hood: Easy Access to the Microcontroller, and I/O Headers. I know, I'm a genius. 
 So, Thats it for now. What about the rest of the bot? Well the main part is over, I mean, the Code works on the Mega32, is now optimized, quite a bit, and I spent an entire long weekend (Long Weekend = Friday + Saturday + Sunday) on it, so it may be atleast another 3-4 weekends that this project will be on hold, so that I can work on other interesting projects. Nothing to be sad about... Next week, I'm working on Panasonic Servo based gantry (Ball Screw), with a Xilinx Spartan XC3S400. Nice....
If you like this post, leave a message, it always makes my day.

